
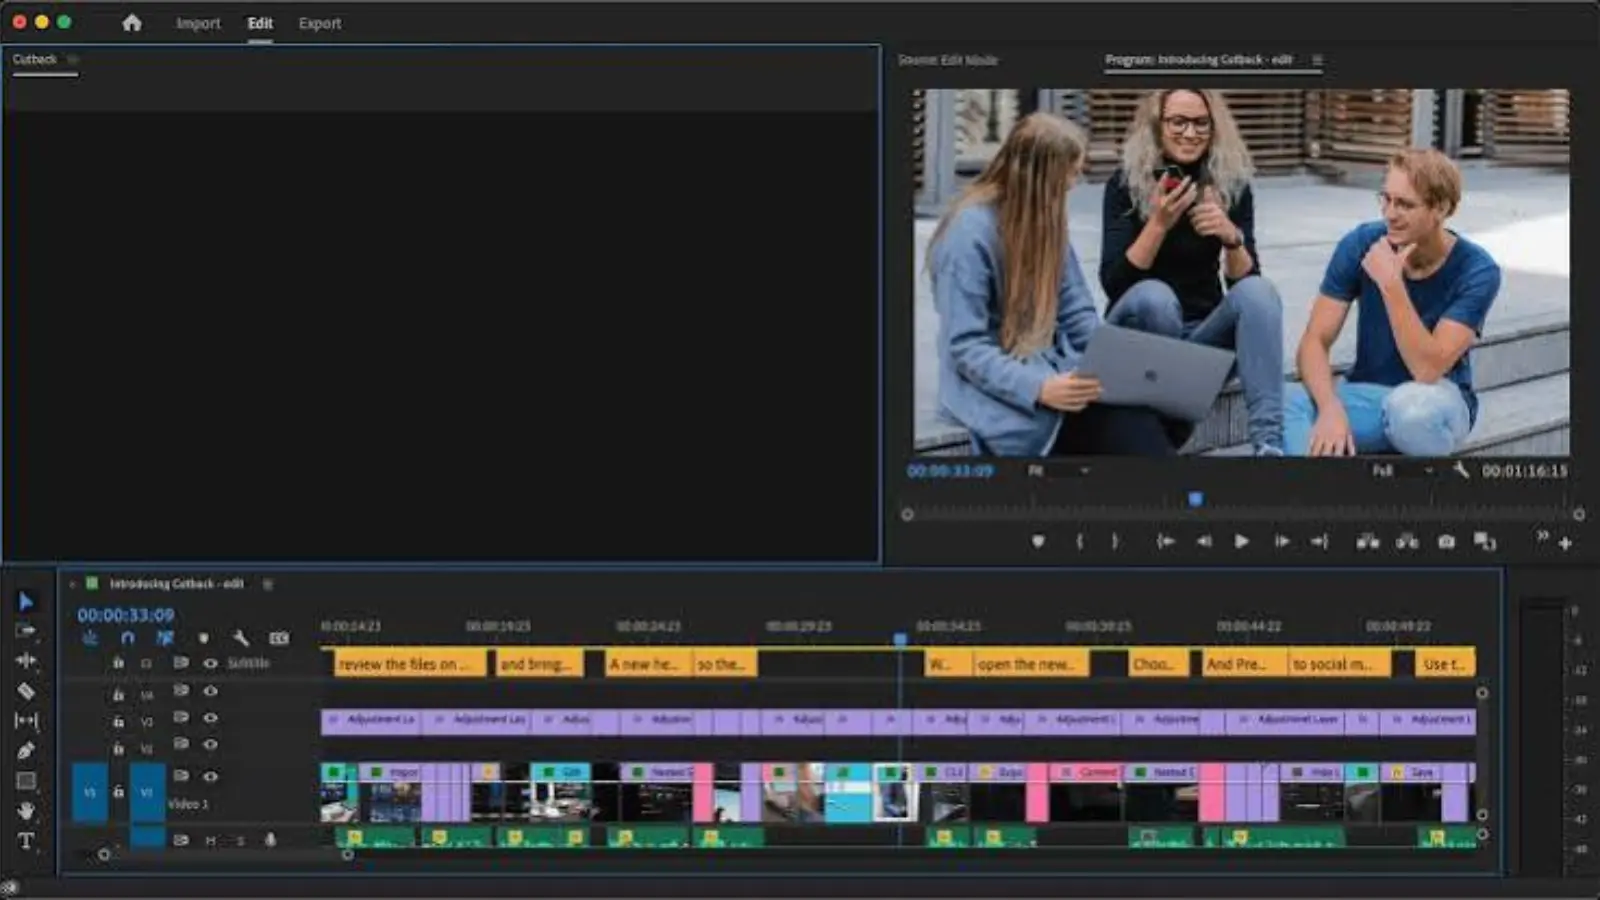
Adding captions to your videos makes them easier to understand, more accessible, and more engaging.
Whether you’re creating YouTube videos, Instagram Reels, TikTok clips, tutorials, interviews, or professional marketing content, captions help viewers follow your message—even when their sound is turned off.
How to add captions in Premiere Pro means creating text synchronized with spoken dialogue, placing it on your video timeline, customizing its appearance, and exporting it so viewers can read along.
Adobe Premiere Pro offers automatic speech transcription and manual caption editing, making it possible to create accurate, professional-looking subtitles without starting from scratch.
This guide explains the complete process, from generating automatic captions to adjusting timing, choosing styles, and exporting your finished video.
1. Understand How Premiere Pro Captions Work Before Editing 🎬
Before creating captions, it helps to understand how Premiere Pro handles text and subtitles. Choosing the correct caption workflow can save time and prevent problems during editing.
1. Captions display spoken dialogue: Captions represent the words people say in a video. They help viewers understand conversations, presentations, interviews, and voiceovers without relying entirely on audio.
2. Subtitles and captions have different purposes: Subtitles generally focus on spoken dialogue, while closed captions can also include meaningful sound descriptions, such as music, laughter, or background noises.
3. Premiere Pro supports caption workflows: You can generate transcripts, create caption segments, edit individual lines, and customize how text appears in your final project.
4. Automatic transcription saves time: Instead of typing every sentence manually, Premiere Pro can analyze the audio and generate a text transcript that you can convert into captions.
5. Manual captions provide more control: If your video contains unusual names, technical language, background noise, or multiple speakers, manual editing helps you achieve greater accuracy.
6. Captions are synchronized with the timeline: Each caption has a start time and an end time. These timestamps determine when the text appears and disappears.
7. Caption tracks organize your text: Caption segments are placed on a dedicated track, allowing you to manage text separately from video footage and audio clips.
8. Caption appearance affects readability: Font size, color, background, alignment, and positioning all influence how easily viewers can read your captions.
9. Burned-in captions become part of the picture: When captions are burned into a video, they remain visible wherever the video is played.
10. Exported caption files offer flexibility: Depending on your export settings, you can include captions in the video or export a separate caption file for supported platforms.
11. Social media videos benefit from captions: Instagram Reels, TikTok videos, and YouTube Shorts often reach viewers who watch without sound, making readable captions especially valuable.
12. A good caption workflow combines accuracy and design: The best results come from checking the transcript, correcting timing, and making sure the text remains clear on different screens.
2. Prepare Your Premiere Pro Project for Caption Creation
A properly organized project makes captioning easier, especially when working with longer videos or multiple speakers.
1. Open Adobe Premiere Pro: Launch Premiere Pro on your computer. Open an existing project or create a new one for your video.
2. Import your video footage: Select your video files and bring them into the Project panel. You can import interviews, tutorials, promotional clips, or social media footage.
3. Create a sequence: Drag your main video onto the timeline. Premiere Pro can automatically create a sequence using your footage’s settings.
4. Check the audio quality: Listen to the video before generating captions. Clear speech produces better transcription results than distorted, extremely quiet, or noisy audio.
5. Remove unnecessary audio sections: If your timeline contains unused clips, long silent sections, or unwanted recordings, clean them up before transcription.
6. Confirm the correct language: Identify the language spoken in your video. Selecting the appropriate transcription language helps improve the accuracy of automatic speech recognition.
7. Review the sequence duration: Check where your video starts and ends. This helps you avoid creating captions for unwanted sections.
8. Rename your sequence: Use a meaningful name, such as Product_Tutorial_Final or Interview_Captions, to keep your project organized.
9. Save your project: Press Ctrl+S on Windows or Command+S on Mac. Saving regularly protects your editing progress.
10. Check the timeline audio tracks: Make sure the dialogue you want to transcribe is available and not muted or disabled.
11. Use headphones when reviewing dialogue: Headphones can help you notice unclear words, overlapping speakers, and background sounds that might be difficult to identify through computer speakers.
12. Keep a clean project structure: Organize your footage, music, graphics, and sequences into clearly named folders so you can find everything quickly.
3. Generate Automatic Captions Using Speech-to-Text
Automatic transcription is one of the easiest ways to add captions in Premiere Pro. It converts spoken words into editable text, reducing the amount of manual typing required.
1. Open the Text panel: Find the Text panel in Premiere Pro. Depending on your workspace and version, you may access it through the Window menu.
2. Choose the Transcript tab: In the Text panel, select Transcript. This section contains the tools used to create and manage your video transcript.
3. Start the transcription process: Select the option to transcribe your sequence. Premiere Pro will analyze the available dialogue and generate text.
4. Choose the transcription language: Select the language spoken in your video. If multiple languages are available in your version, choose the one that best matches the audio.
5. Review speaker identification options: Some versions of Premiere Pro provide speaker labeling or speaker identification features. Enable them when they are useful for your project.
6. Select the correct audio source: If your sequence contains multiple audio tracks, choose the appropriate source or mix so Premiere Pro analyzes the intended dialogue.
7. Start transcription: Confirm your settings and begin the process. Premiere Pro will analyze the audio and create a transcript.
8. Wait for processing to finish: The processing time depends on the length of the sequence, your computer, and the available software features.
9. Read the generated transcript: Once transcription is complete, review the text carefully. Automatic speech recognition can misunderstand names, accents, numbers, and technical terms.
10. Correct obvious mistakes: Edit misspelled words, missing phrases, punctuation, and incorrect speaker labels before converting the transcript into captions.
11. Check the transcript against the audio: Play important sections while reading the text. This helps identify errors that might not be obvious when reviewing the transcript alone.
12. Keep the corrected transcript: A clean transcript gives you a stronger starting point for creating accurate captions and can also be useful when preparing descriptions, summaries, or other video content.
4. Convert Your Transcript Into Editable Caption Segments
After generating and checking your transcript, the next step is converting it into caption segments that appear at the correct moments.
1. Find the Create Captions option: In the Text panel, look for the option to create captions from your transcript. The exact interface may differ between Premiere Pro versions.
2. Open caption creation settings: Select the caption creation command to view available formatting and segmentation options.
3. Choose a caption format: Select a format supported by your workflow and intended delivery platform. Options can vary depending on your Premiere Pro version.
4. Set the maximum characters per line: Decide how much text should appear in each caption line. Shorter lines are generally easier to read on mobile screens.
5. Choose the preferred line arrangement: Depending on the available settings, you may control whether captions use one line or multiple lines.
6. Adjust the minimum caption duration: Set a reasonable minimum display time so viewers have enough time to read each caption.
7. Adjust the maximum caption duration: Longer caption segments may remain on screen too long or contain too much text. Use a duration that supports comfortable reading.
8. Review segmentation settings: Caption segmentation determines where one caption ends and another begins. Break captions at natural speech pauses whenever possible.
9. Create the caption track: Confirm your settings and let Premiere Pro generate caption segments from the transcript.
10. Inspect the timeline: A caption track should appear in your sequence. Expand the timeline if necessary to see individual caption blocks.
11. Play the video: Watch the sequence to confirm that captions appear at the appropriate times.
12. Save the updated project: Save your work after generating the caption track so your transcript and caption edits remain part of the project.
5. Write and Add Captions Manually When Automatic Transcription Is Not Enough
Automatic transcription is convenient, but some projects require more precise control. Manual caption creation is useful for videos with difficult audio, specialized vocabulary, or carefully timed dialogue.
1. Open the captions workspace: Switch to a workspace that gives you easy access to the timeline, Program Monitor, and Text panel.
2. Create a caption segment: Use the caption creation tools available in your Premiere Pro version to add a new text segment.
3. Enter the spoken words: Type the dialogue exactly as it is spoken. Avoid rewriting sentences in a way that changes the original meaning.
4. Set the start time: Position the caption so it appears when the speaker begins the relevant phrase.
5. Set the end time: Make the caption disappear when the spoken phrase finishes or when the next caption should begin.
6. Use natural sentence breaks: Divide long sentences into meaningful sections. Avoid splitting a phrase in the middle of an expression when a more natural break is possible.
7. Keep captions concise: Include the spoken message without adding unnecessary explanations. Viewers should be able to read captions while watching the video.
8. Handle multiple speakers clearly: Use speaker labels when they help viewers understand who is talking, especially during interviews and group discussions.
9. Include important sound information: For accessibility-focused captions, describe meaningful sounds such as applause, laughter, or a loud alarm when relevant.
10. Check punctuation: Use commas, periods, question marks, and other punctuation to make the text easier to understand.
11. Synchronize every segment: Play the video and adjust the caption timing until the text matches the dialogue.
12. Review the complete sequence: Watch the entire video with captions enabled to identify missing dialogue, incorrect timing, and inconsistent formatting.
6. Customize Caption Appearance for a Professional Look ✨
Captions should be easy to read without distracting viewers from the video. A consistent visual style makes your content look more professional.
1. Choose a readable font: Use a clean font with clearly distinguishable letters. Simple sans-serif fonts are often effective for video captions.
2. Select an appropriate font size: Captions should remain readable on smartphones, tablets, and desktop screens. Avoid text that is too small or unnecessarily large.
3. Use strong text contrast: White text with a dark background or outline is a popular choice because it remains visible across many video scenes.
4. Apply a background when needed: A solid or semi-transparent background can improve readability when captions appear over bright or complicated footage.
5. Use outlines carefully: A subtle dark stroke around the text can separate letters from the background without making the captions look heavy.
6. Choose consistent alignment: Center alignment is common for dialogue captions, although other arrangements may suit particular projects.
7. Position captions thoughtfully: Keep captions away from important faces, products, graphics, and other essential visual details.
8. Respect mobile safe areas: Social media interfaces often place buttons, descriptions, and account information near the edges of the screen. Avoid positioning captions where these elements may cover them.
9. Use brand colors sparingly: You can introduce brand colors through highlights or selected words, but maintain enough contrast for comfortable reading.
10. Avoid excessive animation: Flashing, bouncing, or rapidly changing captions can distract viewers. Use motion effects only when they support the content.
11. Maintain consistent styling: Use the same font, size, alignment, and color throughout the project unless a deliberate design change improves understanding.
12. Preview captions on different footage: Test your caption style against bright, dark, moving, and visually busy scenes to ensure it remains readable.
7. Fix Caption Timing and Synchronization Problems
Even accurate captions can look unprofessional if they appear too early, too late, or disappear before viewers finish reading them.
1. Watch for early captions: If a caption appears before the speaker starts talking, move its start point forward to match the dialogue.
2. Correct delayed captions: If text appears after the speaker has already spoken, move the caption earlier on the timeline.
3. Extend short captions: A caption that disappears too quickly can be difficult to read. Increase its duration when the text requires more reading time.
4. Shorten unnecessarily long captions: If a caption stays visible after the relevant sentence has ended, adjust its end point to improve synchronization.
5. Avoid overlapping caption segments: Two captions that overlap unintentionally can create visual confusion. Check their boundaries and adjust them where necessary.
6. Use speech pauses as natural boundaries: Break captions at pauses in dialogue. This creates a smoother reading experience.
7. Keep reading speed comfortable: Avoid placing too many words on screen for a very short period. Viewers need time to process the information.
8. Check fast conversations: Rapid dialogue may require shorter caption segments and careful timing to prevent text from becoming overwhelming.
9. Review speaker changes: When one person finishes speaking and another begins, make sure the captions reflect the correct speaker and timing.
10. Check transitions between scenes: Captions should not accidentally carry over into unrelated footage or remain visible after a scene ends.
11. Listen for overlapping dialogue: When two people speak at once, determine which words are essential and present the information as clearly as possible.
12. Perform a final synchronization review: Watch the complete video with sound and captions together. This is one of the most reliable ways to catch timing problems.
8. Make Captions Work for Instagram Reels, TikTok, and YouTube Shorts 📱
Captions are especially important for short-form content because viewers often scroll quickly and may watch videos without sound.
1. Use vertical video dimensions: Instagram Reels, TikTok, and YouTube Shorts commonly use a vertical 9:16 format. Create your sequence with the intended platform dimensions.
2. Keep captions within safe areas: Avoid placing text too close to the edges, where platform buttons and interface elements may cover it.
3. Use short caption phrases: Short-form videos move quickly. Break dialogue into compact phrases that viewers can understand at a glance.
4. Highlight important words: You can emphasize selected words through color, weight, or other styling choices. Keep highlights consistent rather than changing every word.
5. Make the opening message clear: The first few seconds are important for retaining attention. Ensure that introductory dialogue is captioned accurately and appears promptly.
6. Use captions to support the hook: A strong opening line can communicate the video’s main benefit or question. Captions help viewers understand it even when audio is muted.
7. Avoid covering faces: Position captions where they do not hide facial expressions, demonstrations, or products.
8. Keep hashtags separate from spoken captions: Hashtags such as #VideoEditing, #PremierePro, and #ContentCreation generally belong in the social media post description rather than inside dialogue captions.
9. Consider keyword relevance: A clear video title and description can help platforms understand the subject of your content. Use relevant phrases naturally rather than repeating keywords excessively.
10. Support engagement: Readable captions can make tutorials, tips, and entertaining videos easier to follow, potentially encouraging viewers to watch longer or interact.
11. Test the exported video on a phone: Desktop previews do not always reveal how captions will look on a small screen. Check the final file on a mobile device.
12. Use a consistent caption identity: A recognizable style across Reels, TikTok videos, and Shorts can strengthen your content branding and make your videos feel more cohesive.
9. Improve Caption Accessibility and Viewer Understanding
Captions are not only a design feature. They also help make video content more accessible to people who are deaf or hard of hearing, viewers in noisy environments, and people who prefer reading along.
1. Transcribe dialogue accurately: Correct captions help viewers receive the same essential information as people listening to the audio.
2. Include meaningful sound effects: For accessibility-focused captions, include relevant sounds that affect the meaning of a scene, such as a door slamming or an alarm ringing.
3. Identify speakers when necessary: Speaker labels can help viewers follow conversations when the person speaking is not clearly visible.
4. Use understandable punctuation: Proper punctuation communicates sentence structure, questions, pauses, and changes in meaning.
5. Avoid overly complicated wording: Captions should represent the dialogue clearly. Do not make the text harder to understand by introducing unnecessary vocabulary.
6. Use sufficient contrast: Text should remain distinguishable from the video background, including scenes with changing brightness.
7. Avoid relying only on color: If different speakers or words are identified through color, use labels or other visual clues when needed.
8. Allow enough reading time: Viewers should have a reasonable opportunity to read each caption before it disappears.
9. Keep text visually organized: Consistent line breaks and placement reduce the effort required to follow captions.
10. Check language-specific characters: If your video includes accented letters or non-English text, make sure the chosen font displays the characters correctly.
11. Review captions with the audio muted: Watching without sound is a useful test of whether the captions communicate the essential spoken message.
12. Consider your audience: A training video, entertainment clip, educational lesson, and marketing advertisement may need different caption approaches. Choose the format that best supports the people watching.
10. Export Your Video With Captions Correctly
After editing and styling your captions, you need to export the video using settings that preserve the caption format you want.
1. Open the Export workspace: When your sequence is ready, open Premiere Pro’s export interface using the available export command.
2. Choose your video format: H.264 is a widely supported option for sharing videos online, although the best format depends on your delivery requirements.
3. Select a suitable preset: Choose a preset that matches your platform, resolution, and quality needs. Review the export settings before starting.
4. Decide how captions should appear: Determine whether you want captions burned into the video or included as a separate caption file.
5. Use burned-in captions for universal visibility: Burned-in captions become part of the video image. They are useful when you want the text to appear consistently across social media platforms.
6. Export a separate caption file when appropriate: A separate caption file can be useful when uploading to platforms that support selectable subtitles or closed captions.
7. Check the caption export options: Premiere Pro’s available caption export settings depend on the caption format and software version. Choose an option supported by your intended destination.
8. Use a descriptive file name: Name your exported video clearly, such as Tutorial_With_Captions.mp4, to make it easy to identify.
9. Choose the correct destination folder: Save the finished file somewhere easy to find, especially if you also need to upload a separate caption file.
10. Start the export process: Review your settings and export the sequence.
11. Watch the exported file: Do not assume the final video looks exactly like the timeline preview. Open the exported file and check the captions.
12. Verify the final delivery: Confirm that the captions appear correctly, the video plays smoothly, and any separate caption file is included when required.
11. Troubleshoot Common Premiere Pro Caption Problems
Caption editing can occasionally involve technical issues. Understanding common problems makes it easier to identify the cause and get your project back on track.
1. Automatic transcription is unavailable: Check that you are using a Premiere Pro version with the relevant transcription features and that your project is set up correctly.
2. The transcript contains incorrect words: Review the audio quality and correct the transcript manually. Background noise, strong accents, and overlapping speech can affect transcription accuracy.
3. Captions do not appear in the Program Monitor: Check whether the caption track is enabled and whether the playhead is positioned inside a caption segment.
4. Captions are missing after export: Review the export caption settings. You may have exported the video without including or burning in the caption track.
5. Text looks too small: Increase the caption font size and preview the result on a smaller display to make sure it remains readable.
6. Captions are positioned incorrectly: Adjust their placement in the caption styling controls and check that they do not overlap important visual elements.
7. Caption segments overlap: Inspect the timeline for overlapping blocks. Move or trim the segments so that the timing is correct.
8. Some words are missing: Compare the transcript with the original audio. Add missing dialogue manually and confirm that the corresponding caption segment has the correct timing.
9. The wrong language was transcribed: Review the language selection and generate a corrected transcript if necessary. You may also edit the transcript manually.
10. Captions are difficult to read over bright footage: Add a background, outline, or stronger text contrast to separate the words from the image.
11. The caption file does not work on another platform: Check whether the destination platform supports the exported caption format. If necessary, export a compatible format.
12. Premiere Pro becomes slow during editing: Close unnecessary applications, save your project regularly, and consider working with shorter sequences if your system struggles with long or complex timelines.
12. Build a Repeatable Caption Workflow for Better Video Growth 🚀
A reliable caption process makes video production faster and helps maintain quality across different platforms. Once you understand the basics, you can turn captioning into a standard part of your content strategy.
1. Start with a clear content goal: Decide whether your video is designed to educate, entertain, promote a product, or build a community. The goal influences caption length, tone, and style.
2. Prepare clean audio before editing: Clear dialogue makes transcription easier and reduces the time spent correcting mistakes.
3. Generate a transcript early: Use automatic transcription when it is suitable for your footage. Editing the transcript before creating the final caption track can simplify the process.
4. Create a reusable caption style: Develop a consistent font, color, size, and placement. Reusing a style saves time and gives your videos a recognizable appearance.
5. Develop platform-specific versions: A long YouTube tutorial and a short Instagram Reel may need different caption layouts. Adjust the design to match each format.
6. Use natural language in video content: Speak clearly and organize your message around topics your audience cares about. This can improve the usefulness of both the video and its transcript.
7. Write relevant social media descriptions: Use a clear post description that explains what viewers will learn or experience. Naturally include relevant search terms when they genuinely fit.
8. Choose relevant hashtags: Hashtags such as #PremierePro, #VideoEditing, and #CaptionTutorial can help categorize social content. Use a small, relevant selection rather than adding unrelated tags.
9. Monitor engagement rate: Review available platform analytics, including watch time, retention, shares, saves, and comments. These metrics can help you understand how audiences respond to your videos.
10. Test different caption designs: Experiment with font size, background, placement, and highlighting. Compare the results using actual viewer feedback and performance data.
11. Build a caption quality checklist: Before publishing, verify spelling, timing, punctuation, contrast, accessibility, and export settings. A consistent checklist reduces avoidable mistakes.
12. Improve your process over time: Review successful videos, identify recurring caption problems, and update your workflow. Small improvements can make content creation more efficient and consistent.
Frequently Asked Questions About Adding Captions in Premiere Pro
1. Can Premiere Pro automatically generate captions?
Yes. Premiere Pro includes speech-to-text functionality that can transcribe spoken dialogue and help you create caption segments. You should still review the transcript because automatic transcription may misunderstand words, names, accents, or technical terminology.
2. How do I add subtitles in Premiere Pro manually?
Create a caption segment using the caption tools available in your version of Premiere Pro. Enter the dialogue, set its start and end times, and repeat the process for the remaining sections of your video.
3. How do I edit captions in Premiere Pro?
Open the Text panel or caption controls, select the caption you want to change, and edit its text. You can also adjust its timing, formatting, and placement.
4. Can I change the font and color of captions?
Yes. Premiere Pro provides caption styling options that allow you to customize properties such as font, size, color, alignment, and background, depending on the caption workflow and version.
5. How do I export captions from Premiere Pro?
Open the Export workspace and review the caption settings. Depending on the available options, you can burn captions into the video or export a separate supported caption file.
6. Should I burn captions into my video?
Burned-in captions are useful when you want text to remain visible on every playback device and social platform. Separate caption files are more flexible when viewers need to turn subtitles on or off.
7. Are captions important for Instagram Reels?
Yes. Captions can help viewers understand Reels when they watch without sound. They also make spoken information easier to follow, particularly when a video contains instructions, explanations, or dialogue.
8. Can I use Premiere Pro captions for TikTok and YouTube Shorts?
Yes. You can create captions in Premiere Pro, export a vertical video, and use burned-in captions or a supported separate caption workflow. Always check the final video against each platform’s layout.
9. Why are my Premiere Pro captions out of sync?
Captions may be out of sync because their start or end times do not match the dialogue. Move the caption segments on the timeline and review the sequence while listening to the original audio.
10. Can I create captions in languages other than English?
Premiere Pro’s transcription language support depends on the software version and available features. Check the language options in your installed version. You can also create or edit captions manually for languages that require a different workflow.
Conclusion: Make Every Video Easier to Watch With Premiere Pro Captions
Learning how to add captions in Premiere Pro can improve the quality, accessibility, and presentation of your video content.
Whether you use automatic transcription or create captions manually, the most important steps are checking accuracy, synchronizing text with speech, choosing readable styling, and exporting the correct caption format.
For social media creators, captions are particularly useful for Instagram Reels, TikTok videos, and YouTube Shorts, where many viewers watch without sound.
A clear caption style can make tutorials easier to follow, strengthen your visual branding, and create a better viewing experience.
Start by importing your footage, generating a transcript, converting it into caption segments, and reviewing every line.
Then customize the appearance and export a test video before publishing.
Your next step: Open a short video in Premiere Pro and practice creating, styling, and exporting captions.
Once you have a reliable workflow, apply it consistently to your future videos and use audience feedback to keep improving your content.

Noah Parker enjoys creating original pick up lines that are funny, smooth, and easy to use. He writes playful content inspired by online trends, dating culture, and everyday conversations.